In order to communicate guitar lessons material clearly it is necessary to have a system in place by which we can identify some of the major items involved in playing guitar.
We learned earlier how to identify the guitar strings by number (1-6) with the 1st string being the high E string. (See "Naming the Open Guitar Strings")
We will also assign a numeric identifier to each fret on the guitar and each finger of our left hand (for right handed players).
From a technical standpoint, the frets on a guitar are the metal wires embedded into the fret board. From a practical point of view, however, when we refer to frets we are referring to the area of the fret board directly behind the metal fret.
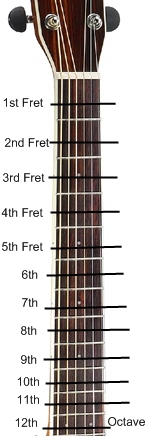
As you can see from the diagram, you start with the fret that is at the end of the neck, closest to the nut. (See "Parts of the Guitar") That is called the 1st fret, and the rest are numbered sequentially up the neck.
There are a couple of points to note about the fret numbering. First, notice that there are dots on the fret board, or “position markers”, at the 3rd, 5th, 7th, 9th frets, and a double marker at the 12th fret. These dots are there to help you quickly locate a fret and your position on the neck. These will be very useful to you later on.
Secondly, look at the 12th fret that has 2 position marker dots. These 2 dots indicate that you have reached the octave point of the guitar neck. This means that the note value of the open strings have come full circle and will start over in a higher range. For example, the open 6th string is an "E" note and upon reaching the 12th fret of the 6th string you arrive at "E" again. This is known as the "octave" note.
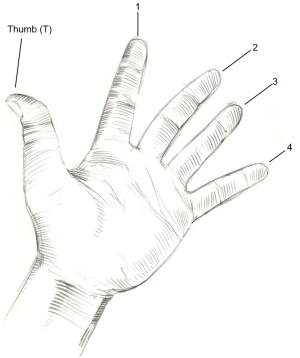
As with the guitar strings and frets on the neck, we also assign a numeric value to the fingers of the left hand (for right handed players) so that we can discuss clearly where to put the fingers.
This is fairly straightforward. The first finger is # 1, middle finger is # 2, third finger is # 3 and the pinky is # 4. Please make a note of this because it will come up repeatedly in future lessons.
To put this all together in a real life example – you will quite often hear something like “put your 2nd finger on the 4th fret of the 3rd string”, or, “the E chord is formed by placing your 2nd finger on the 2nd fret of the 5th string, your 3rd finger on the 2nd fret of the 4th string and your 1st finger on the 1st fret of the 3rd string”.
As you can see, this is far from rocket science. But having a good understanding of this material will make your early days of guitar lessons go much more smoothly.
Please do not hesitate to contact us if you have any questions!
As we prepare to discuss tuning the guitar, (see "Tuning the Guitar") we must first cover the names of the open strings.
The ability to name your open notes, as well as identify some of the notes up the neck of the guitar, will take you a long way in your learning process and make things much easier for you to progress on the guitar.
Don’t worry too much about getting this all under your belt immediately but you will soon discover that this is all fairly easy to get a grasp on.
In terms of general music notation there are only 8 notes to be concerned with. They are – A, B, C, D, E, F & G. In between those are what are known as sharps and flats. We will get into more detail on this later but for now just remember that the letters A through G represent the 8 notes in musical notation and that musically there is no H, I, J, K and so on.
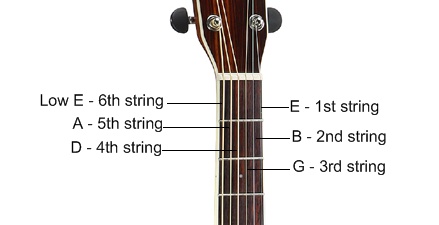
In terms of the guitar itself, there are six strings, and each one corresponds with, and can be referred to, a musical note. They are E, A, D, G, B, & E.
As you are seated with the guitar in your lap, the string closest to you is the low “E” string. This is the thickest string and the one that produces the lowest note on the guitar.
Starting on this low E string you can name the notes in order as so:
E, A, D, G, B, E (from top to bottom)
You will notice that the 2 outside strings – the thickest and the thinnest – are both E, one is just an octave of the other.
Quite often guitar strings are referred to by a number. In that case it is important to note that the 1st string is the high E string and then in order up from there. In other words, as you are seated with the guitar in your lap the 1st string would be the one that is farthest away from you or closest to the floor – and the 6th string is the one closest to you, or the low E string.
Example: If someone says “play your 3rd string” you now know they are referring to your G string. (See above diagram)
The main thing to keep in mind is that, when referring to the names of the strings by "letter" (note) name, you will most often hear them referred to in ascending order starting on the "low" E string. (the one closest to you).
However, when referring to the strings by "number", it is just to opposite. The 1st string (high E) is the one that is the farthest away from you, as you sit holding the guitar, and the numbers go from bottom to top.
Please do not hesitate to contact us with any questions!
Just like guitars, guitar picks come in all shapes and sizes. And like many other aspects of playing guitar, the pick you ultimately use depends largely on what type of playing style you develop and what is comfortable to you.
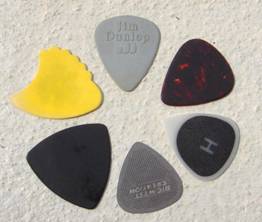 Standard picks are triangular in shape and come in various thicknesses. When first starting to play guitar, a thin pick will work well because it is flexible and accommodates strumming. As you progress into single note picking and playing lead guitar you may find that a medium or heavy pick is more suitable.
I would recommend that you work your way up to a medium thickness pick as that will be flexible enough for strumming, yet rigid enough for single note picking.
Either way, picks are cheap so grab a handful and test drive a few of them until you find something that feels good to you. I usually take a couple of different size picks with me to gigs so that I can be ready for any style of playing.
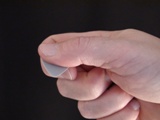
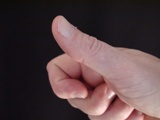 You will want to grasp the pick between the thumb and first finger of the right hand. You can start by curling the first finger over until the top part of the finger is parallel with the outside part of the thumb.
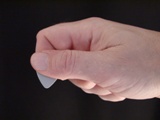
Hold the pick between the first finger and thumb so that the point of the pick is perpendicular to the plane of the bottom part of the thumb.
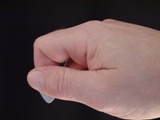
You will need to leave enough of the pick visible that you have sufficient surface area to strike the strings, yet not so much that you loose your grip on the pick. This is all trial and error and will feel more natural after you have logged some time on the guitar.
Learning how to hold the pick, and the guitar, can feel a little awkward at first, but don’t get too frustrated. Before long you won’t think twice about it!
Please do not hesitate to contact us with any questions!
Fretting the guitar is the act of placing the fingers on the fretboard in such a way that the note played sounds clear and full. In short, fretting is how you put your fingers on the strings to get the guitar to sound right!
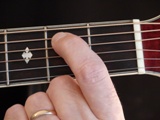
The first thing to be aware of in regards to fretting is that the best spot on a fret to put your finger is the area of the fret directly behind the fret "wire". That area is the "sweet spot".
That works fine for playing single note picking, but the problem arises in playing chords. With many chord formations it is simply not possible for every finger to be on a fret on the "sweet spot" and still form the chord.
As a result there are several other factors that come into play in regards to fretting. They are, finger curl, thumb leverage and clearance.
Finger Curl
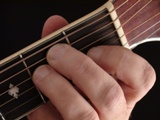
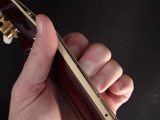
When forming a chord on the guitar it is important to curl the fingers in such a way that the tips of the fingers are able to attack the proper frets. This allows the fingers to apply proper pressure to the strings. There is a natural tendency with new players to want to keep the fingers straight when forming chords, but this will not provide enough finger pressure on the fretboard and will result in string "buzzing".
Thumb Leverage
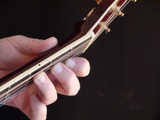
In order to assist with added finger pressure on the fretboard you may incorporate the use of thumb leverage. By placing the thumb on the back of the neck, you can use that position to get the leverage you need for added finger pressure. The ability to use thumb leverage is often dependent on what chord you are playing and in which position on the neck. Sometimes you can make use of it, others it may not be feasible. The use of the thumb for added leverage is largely a personal decision in terms of what you become comfortable with.
Clearance
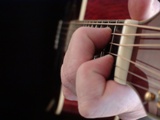
It is important to have enough clearance in your hand position allow any surrounding open strings to ring clear without touching them, while at the same time, applying finger pressure to the proper notes. It is largely a matter of adjusting the finger curl and the thumb leverage to accomplish this. The goal is to play the notes that form the chord without muting or buzzing any of the surrounding strings. This will take a little practice for the beginning guitarist to work out but it will, in time, become easier.
Finger Soreness
It is inevitable that, in the early days, you will experience some soreness on your fingertips. This is a natural result of pressing soft flesh to metal strings! The good news is that this will pass after a while as you develop calluses on your fingertips.
Keep working on finding the best hand and finger position while still making the chords sound clear and full. In the end, it is all about what is most comfortable to you so be patient and it will fall into place.
Please do not hesitate to contact us with any questions.