Barre Chords
Lesson Goals:
♦ Learn definintion of a barre chord
♦ Learn barre chords in the "E" shape
♦ Learn F, G and A barre chords
When you need to play chords beyond the position of the lower open chords you will often use "barre" chords.
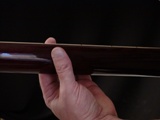
A barre chord is played by pressing the 1st (index) finger across the neck and then forming a chord shape with the remaining fingers.

If you remember back to the tutorial on naming the parts of the guitar, you may recall that at the lowest point of the fret board is the "nut". The nut is the lowest point at which a string can produce sound.
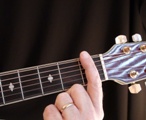
When a barre chord is formed higher up the neck, the 1st (index) finger "becomes the nut" so that the chord can be formed in the proper voicing.
When the 1st finger becomes the bar across the strings, the other three fingers are free to form chords. Quite often the "shape" or "pattern" of these chords is similar to some of the most common open chords.
Two of the most common "shapes" used in barre chords are the "E" shape and the "A" shape.
In this lesson we will look at barre chords using the "E" shape.
Look at the diagram below.
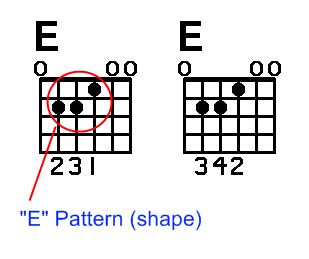
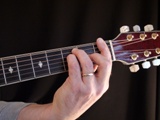
When playing an E chord in the open position, the fingering is like the diagram on the left. But if we want to play a chord using the E shape somewhere higher up the neck we have to re-arrange our fingering to free up the 1st finger to make the bar.
As a result, we will need to form the E shape as on the diagram to the right (above).
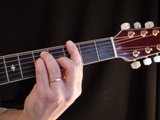
If we wanted to slide the "E" chord up one fret and barre it, here is what it would look like.
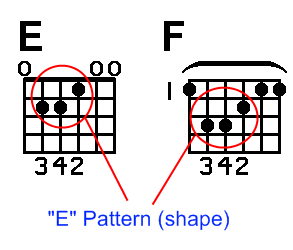
This is now an "F" chord. Notice that the "E" shape is the same. The chord voicing is maintained by barring the 1st fret.
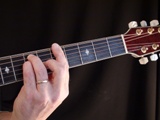
Now let's slide up to the 3rd fret and look at a "G" barre chord and make a comparison.
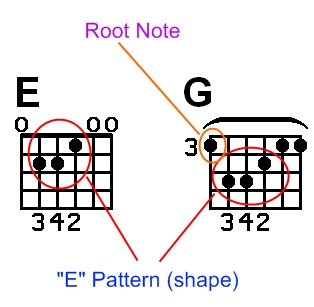
The "E" shape is the same, but this time the 1st finger is barring the 3rd fret. Notice that the root note of the barre chord in the "E" shape is the lowest note of the chord on the 6th string.
In the above example, the lowest note of the barre chord is on the 3rd fret of the 6th string. You should remember that this is a "G" note so the chord is a "G" as well.
In the previous example the chord started on the 1st fret of the 6th string which is an "F" note. Therefore, the chord is an "F".
The beauty of barre chords is that they are "movable". You can slide them up and down the neck anywhere to play any chord. Below is the "A" barre chord on the 5th fret.
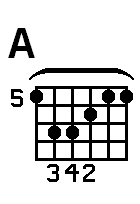
As you can see, if you know the notes on the 6th string, you can play virtually any major chord in this chord "shape" that you want to.