
Twist & Shout (Part 1)
Lesson Goals:
♦ Review finger positions for the C, F and G chords
♦ Visualize chords and play then without looking at the charts
♦ Become comfortable with playing the chord changes
The old Beatles classic “Twist & Shout” is a great example of a song using a C, F and G chord progression.
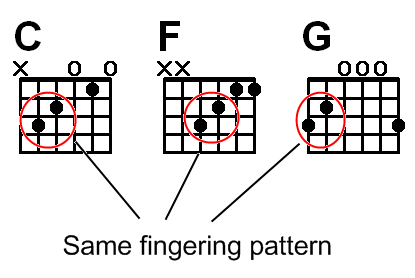
Let's first take a moment to review the 3 chords. If you remember back to Lesson 19, we did a comparison on the similarities between the C chord and F chord and how you can take advantage of those similarities to easily change back and forth between the two.
In taking a closer look at the position of the 2nd and 3rd fingers on the G chord you will notice that the finger positioning is identical to the pattern we mentioned for the C and F chords. Again, only a shift in strings is needed.
You can literally keep the 2nd and 3rd fingers in the same position and just shift them between strings while changing chords.
Of course you will adjust the position of the 1st and 4th finger accordingly but keeping your finger movement to a minimum with the 2nd and 3rd fingers will make the changes go much more smoothly.
Let’s start with an exercise to get used to the chord changes.
In this exercise play the chord changes using only down strokes to get a feel for things. Notice that the chords change twice per measure and the changes occur on the “one” beat and the “three” beat.
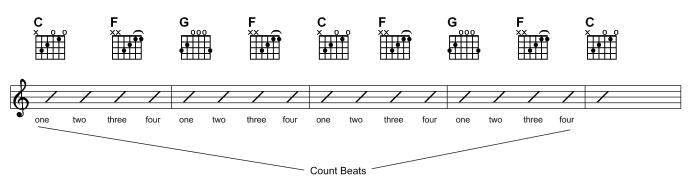
Play this very slowly to begin with until your fingers are able to make the changes cleanly. Then gradually work up speed. This exercise is designed mainly for your left hand to make smooth transitions between the chords.